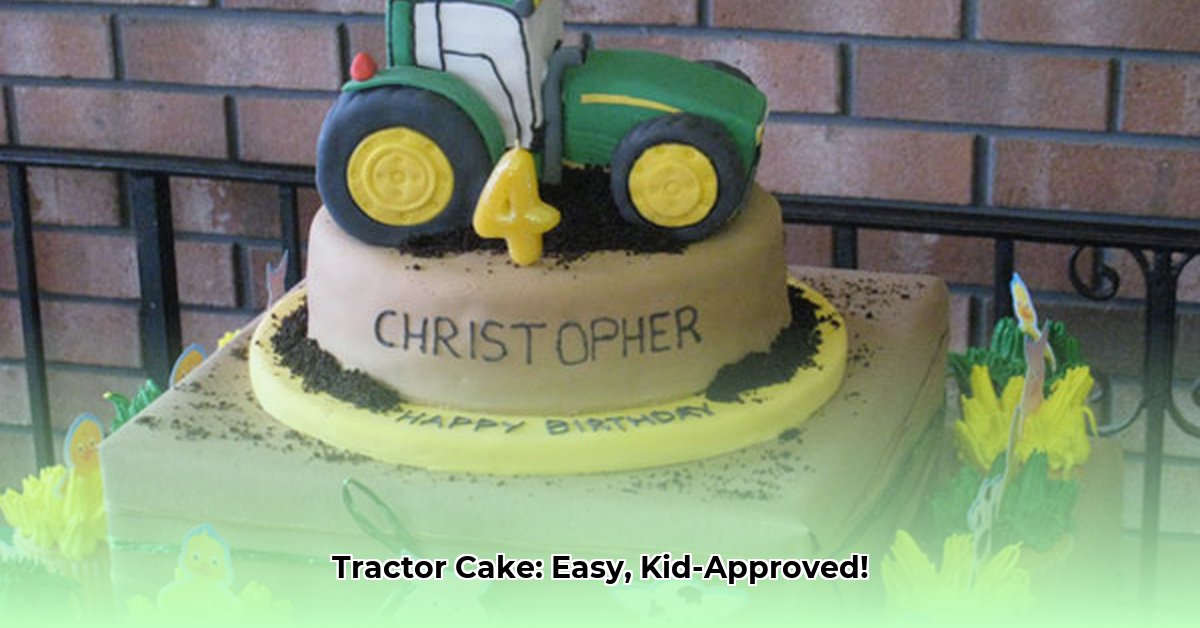
Throwing a birthday bash? Ditch the boring cakes and rev up the fun with an awesome tractor cake! This guide offers two easy methods, perfect for bakers of all skill levels. Whether you're a seasoned pro or a first-time baker, we'll guide you through creating a delicious and adorable tractor cake that will be the star of the party. Get ready to transform a simple cake into a farm-fresh masterpiece! For more tractor cake inspiration, check out this [John Deere cake](https://john-deere-tractor-birthday-cake.pages.dev).
(Insert image of a finished, charming tractor cake here)
Choose Your Tractor-Building Adventure: Easy Peasy or Fancy Schmancy?
Want a quick and easy tractor cake or a show-stopping masterpiece? Your choice depends on your baking skills and available time.
| Feature | Super Simple Method (Beginner-Friendly) | Detailed Design Method (Pro Baker) |
|---|---|---|
| Skill Level | Beginner | Intermediate/Advanced |
| Time Commitment | ~1-2 hours | ~3-4 hours or more |
| Cake Base | Store-bought or pre-baked layers | Homemade, possibly carved |
| Frosting | Buttercream | Buttercream |
| Decorations | Rice Krispies Treats, simple fondant | Intricate fondant, detailed painting |
| Best For | Beginners, short on time | Experienced bakers, show-stopping cake |
The Speedy, Simple Tractor Cake Method: Get It Done Fast!
Perfect for beginners or those short on time, this method is a guaranteed success.
Step 1: Bake (or Buy!) Your Cake Layers: Use a boxed cake mix or pre-baked layers from your local bakery – no judgment here!
Step 2: Frost Those Layers: Apply a thin, even coat of your favorite buttercream frosting. Smoothness is key for a professional look. (Image of frosting cake layers)
Step 3: Shape Your Tractor: Stack the frosted layers to create your tractor shape. A rectangle makes a great body, a smaller square becomes the cab. Chill for 30 minutes to firm up. (Image of assembling cake layers)
Step 4: Create the Wheels!: Use Rice Krispies Treats (easily shaped) or store-bought donuts for sturdy wheels. (Image of adding rice krispie treats or donuts)
Step 5: Add Simple Decorations: Use simple fondant shapes for headlights and a smokestack. Get creative! (Image of adding simple decorations)
Possible Hiccups (and Fixes): Rice Krispies Treats may be less stable. Ensure frosting is firm before adding wheels, and chill the cake longer.
The Detailed, Show-Stopping Tractor Cake: Ready for a Challenge?
This method creates a realistic tractor cake – it's worth the extra effort!
Step 1: Bake and Level Cake Layers: Bake several layers for a thicker, more stable base. Freezing beforehand makes carving easier. (Image of baking and leveling multiple cake layers)
Step 2: Carve Your Tractor Shape: Carefully carve the chilled cake layers into a tractor shape. A sharp, serrated knife is a must. (Image of carving cake layers)
Step 3: Frost It Beautifully: Apply a smooth coat of buttercream – your blank canvas. (Image of frosting carved cake)
Step 4: Fondant Time!: Roll out fondant and carefully cover the cake in sections, smoothing as you go. (Image of covering cake with fondant)
Step 5: Create Amazing Fondant Details: Use fondant to sculpt wheels, headlights, a grill, and more. Practice first on scrap fondant. (Image of fondant details being added)
Step 6: Add Finishing Touches: Use food coloring pens or edible paint for stripes, a license plate, etc. (Image of finished detailed tractor cake)
Possible Challenges (and Solutions): Fondant cracks can be fixed with a little water. Chilling the cake before carving makes it easier.
Tips & Tricks for Tractor Cake Success!
- Cracked Fondant? A small amount of water can often repair minor cracks.
- Uneven Cake Layers? Level them before frosting for a smoother finish.
- Don't Stress: Imperfections add character!
Customize Your Tractor and Make it Unique!
Personalize your tractor cake! Use different colors, add farm animals, or create a specific tractor model. The possibilities are endless!
Conclusion
Whether you choose the quick and easy method or the detailed approach, creating a tractor cake is a fun and rewarding experience. Enjoy the process and watch your delicious creation become the highlight of the birthday party! Happy baking!